The Mobilink is an inexpensive and robust GSM/UMTS Gateway, but onfortunately there is almost no information regarding it's setup. And as always with these devices, configurtion can be a pain. So i'll provide you a step-by-step with screenshots.
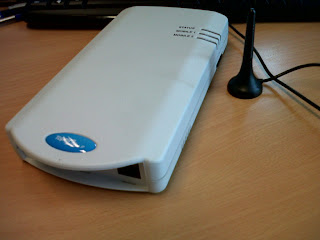
This is the Mobilink, complete with Antenna with a long cord, so you can place it where needed.

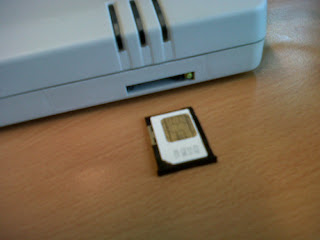
First off, insert a simcard in the mobilink.
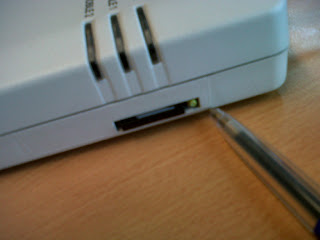
You can open the simtray by pressing the small yellow button with a pen.


Then connect it to your network, the default IP address is: https://192.168.173.1
Click on administration in the left pane, you'll be prompted to log in.
Default username: admin
Default Password: 99admin11
When you login to the webpage, you'll see that the WI is not too intuitive, but hey, the device costs less then a smartphone... What do you expect:)
If you have a pincode on the sim, you need to enter that in the Mobilink.
click mobile in the left pane --> settings --> more
here you can enter the pin.
Next we best change the network settings to fit your needs.
Click network in the left pane --> IP Settings --> correct them and save.
Now click the "commit" button on the left and let the device reboot.
You can now access the device on the entered IP address.
It's best to see if there's mobile connection now
Mobile --> status
Next you need to configure the incoming calls.
Go to Call controll --> Access IN --> enter your pbx IP here.
Now for Incoming mobile calls:
Call control --> Incoming Calls --> Edit --> More --> make sure mode is set to "trunk" and you are using "target" mode. Enter the local PBX extension where incoming calls should be connected to in the "target" field.
Leave all the rest default.
Now configure outgoing calls:
Call control --> Outgoing Calls --> Enable (that's all for defaults)
Next you need to tell the Mobilink where your PBX is:
Call Controll --> Settings --> here you can enter the PBX IP
Now click Commit to save everything and reboot the device.
That's it, the Mobilink is ready for action. Now for the PBX.
First off, we need to configure the Mobilink as PSTN Gateway, so NOT as trunk for outgoing.
In the 3cx management console go to pstn devices --> add gateway --> choose generic --> enter the name for the gateway --> Next
Enter the IP of the Mobilink and keep the rest as shown in the screen. --> Next
In the overview choose which inbound extensions will be called when there is an incoming call... but this doens't matter, because the Mobilink invites the target you specify. --> Next
Now you have the outgoing PSTN device ready.
Create an outbound rule stating that phonecalls starting with the celular prefix of your country should be routed to the pstn gateway(mobilink)
Now we need to configure incoming calls from the Mobilink to the 3CX PBX.
Open the Voip providers tab in 3CX Managament console --> Add voip provider --> Generic Sip Trunk --> Next
Enter the IP of the Mobilink--> Next
In the next screen you'll need to enter the external number (doesn't matter what you enter here) and an auth. ID, doesn't matter either. --> Next
Skip the incoming and outgoing rules and finish the config.
Now open the Voip provider(Mobilink) you just made by double clicking it and go to the "Source ID" tab. --> Check the thick that says "Source identification by DID"
--> click "Add Mask" --> enter * as mask --> Apply.
Ok, we're done, you should be ready to make phonecalls in and out using the Mobilink GSM Gateway with 3cx. If not leave a message and I'll see if I can help you.


No comments:
Post a Comment